Is Zion National Park on your “must-visit” list this year? Chances are you are not alone. The National Park Service (NPS) estimated Zion NP received 4.7 million visitors in 2022! Zion is one of the top visited national parks, and for good reason. It’s simply stunning. I’m excited to share how to experience Zion National Park in three days, and help you decide what to do in the park.
We visited Zion National Park as part of a road trip in September 2019. This trip was one of our travel “rocks” because he had a work conference in Scottsdale, Arizona, meaning some of our travel costs were covered! We decided to hit Zion, Bryce Canyon National Park, and Page, Arizona.
The challenge with any national park is deciding what to do and how to make the most of your time. We booked 4-nights in Zion NP, meaning we had three full days to explore the park. In retrospect, I think this was the perfect amount of time to hit the highlights. Of course, more time is always better. But three full-days allowed us to hit our “must-dos.”
I did a ton of research prior to our trip to Zion. I’m sharing our day-by-day itinerary so you’ll know how to experience Zion National Park in three days!

Day by Day Itinerary
From Scottsdale, we enjoyed stunning views as we entered the park from the east entrance in the late afternoon. If you enter the park from the east, prepare to be wowed with your camera ready as you go through and exit the Zion Mount-Carmel Tunnel. The views only grow more impressive as you make your way down the switchbacks. There are many lookouts and places to pull over after the tunnel.
Our lodging was in Springdale, Utah, just a 10-minute drive from the park entrance and Visitor Center. Springdale was a perfect location based on all we had planned.
We had an early dinner and bedtime because our first full day in Zion was a big one!
Day 1: Angel’s Landing
Note: as of this post, April 2023, a permit is required to hike Angel’s Landing.
Yup, we started off with a bang! Angel’s Landing was our top “must-do” hike.
The day started early… Around 4:00am. I wanted to ensure we were in line early to catch the first shuttle into the park to take us to the trailhead. Note: we completed this hike before the NPS put the Angel’s Landing permit system in place .
After the shuttle ride we set off on the trail in the dark with our headlamps around 6:30a.
If you’re not familiar, Angel’s Landing is a strenuous 5.4 mile trail with over 1,400 feet of elevation gain. Even before the chain section begins, the elevation gain on this trail is no joke. This trail is pretty much “up” the entire way.
If you want to know in detail what it’s like hiking Angel’s Landing and how to prepare, please read our in-depth guide.
Nearly an hour later, we arrived at Scout Lookout and took a short break. It was time to start the infamous chain section, a half-mile push to the summit.
I’ll be honest with you. I was not mentally prepared for the this strenuous trail section with dangerous drop offs. As we began I got scared and doubted my abilities. I would have preferred to stay at Scout Lookout and wait for my husband, but he told me, “We made it this far, you’re going. We’ll take it slow.”
After some intense rock scrambling and trying to ignore the exposed drop-offs, we made it to the summit around 8:00a. Shameless plug: I was never so happy to have on a good pair of hiking boots!
I was glad he gave me no option but to push through. The sun was coming up over the cliffs and the views were simply stunning.


We made it back to Scout Lookout around 9:20a. We realized how exhausted and sore we were once we started our final descent to the trailhead; the adrenaline had worn off. Luckily the the incredible views helped distract us on our way down.
We arrived back at the shuttle stop at 11:30a. Angel’s Landing took us five full hours, factoring in rests, enjoying the summit, and taking a break around Scout Lookout.
If you are looking for food after hiking Angel’s Landing, Zion National Park Lodge is nearby with dining options. If you still have gas in your tank to hike more, the Emerald Pools trailhead is across from the lodge, or you could connect to the paved Pa’rus Trail to get back to the Visitor Center.
For us though, Angel’s Landing did us in for the day. After cleaning up at our hotel we picked up our gear from Zion Outfitters, grabbed dinner, and enjoyed sunset at our hotel as we prepped for the next day’s hike… The Narrows!


Day 2: The Narrows
On day two we planned to hike The Narrows. We slept in a *little* later, but still arrived at the Visitor Center in time to catch the 7:15a shuttle. We noticed how much busier the Visitor Center was, and the longer line to catch the shuttle.
The ride to the Temple of Sinawava shuttle stop was 45-minutes. From there we walked the one-mile Riverside Walk trail in our regular hiking boots, which led right into the Virgin River where The Narrows begins. We changed into our rental wet gear (neoprene socks, canyoneering boots, dry pants for him, etc.) at the end of Riverside Walk.
Yup, you read that correctly. The Narrows trail is actually in the Virgin River! Meaning, you literally walk on the rocky river bed, through flowing water. Needless to say this is a very unique hike!
If you want to learn more about what it’s like hiking The Narrows and how to prepare, please read our in-depth guide.
We set off into the river around 8:30a. The water was 64 degrees that day, and the high temperature was 81. Layers are definitely key for this hike. You do not want to be cold while you are hiking in water, and because the canyon is narrow, there isn’t a lot of sun.
What is it like hiking in the river? Sloooooow! Prior to our experience I had heard it described as hiking over “bowling balls.” We agree that is a fairly accurate description. The water depth varies quite a bit. Some spots are deeper, but the footing is sandy and easy to traverse. Other sections are not as deep but the water is flowing faster over large rocks, where it is much easier to loose your footing and fall. We were grateful for the walking sticks to help keep us upright!


After two hours of making our way up the river, we reached the Orderville Canyon junction, and decided to hike up the canyon a bit. Our lunch spot ended up being a large rock in the narrow slot canyon, where we enjoyed our PB&J sandwiches and snacks. Back at the junction we decided to go a bit further to enjoy the Wall Street section, which was amazing.
Around noon we were getting tired, and decided it was time to turn back to Riverside Walk.
At 1:30 we reached a packed Riverside walk, and received a heroes welcome! Everyone clapped and asked us what it was like. We quickly changed out of our wet gear (which was 110% worth the rental cost, btw!), and I realized I didn’t bring a change of bottoms (oops!). Needless to say the shuttle ride back to the Visitor Center was not the most pleasant in my soaking wet shorts. Overall though we considered our Narrows experience a great success!
By this time it was late afternoon and we were starving. We cleaned up at the hotel, happy to be dry and comfortable, dropped off our rental gear, and went to Zion Noodle & Pizza Company for a yummy dinner.
After a great meal and rest, we headed to Canyon Junction Bridge to watch sunset. Canyon Junction is a very popular place to watch sunset in Zion, and for good reason. The scenery is fairytale-like as the sun drops and the light changes across the canyon. Go early to get your spot on the bridge!

Day 3: Going with the Flow
Okay, so we were due for a slow morning, and slept in a bit on our third day. I would later regret this decision (hah!). We grabbed breakfast at our hotel, and left for the park around 9:45a. I had hoped to hike 7+ miles to Observation Point, but we agreed that hike would go on the list for our next Zion visit. Instead, we drove into the park to watch the video at the museum.
Our plan quickly went out the window though. With our late start the park was already packed since it was a Saturday. We had to wait to enter the park, and then couldn’t find parking at the museum so we kept driving. Canyon Overlook hike was on my list, and we got lucky to find a parking spot just past the main parking area as you exit the tunnel heading east. Pro-tip: stay flexible!
We grabbed our go-to hiking backpack and set off. If you are looking for a short (1-mile out-and-back) hike with big pay offs, Canyon Overlook is for you! There are amazing views at the top as you look into Zion Canyon.


Determined to watch the movie, we drove back towards the museum and scored a parking spot near a shuttle stop. We took the shuttle to the museum and enjoyed the short movie. The best part though was the view in the back of the museum. We sat outside with no one else around and had our lunch (yes, PB&Js for the third day in a row!). Make sure to enjoy the view behind the museum!
I was determined to do one more hike. Lower Emerald Pool was open, so we rode the packed shuttle to the trailhead. Due to our early starts the days prior, we were accustomed to hiking generally by ourselves in peace and quiet. Peace and quiet was not an option on this hike with hordes of people. Sadly, this was a terrible experience. We passed multiple people blasting music from blue tooth speakers. Who does that?!
Do I sound like a grumpy curmudgeon? I am who I am.
Pro-tip: If you are visiting the park during the busiest times (May, June, and July), get up early to avoid the crowds!
We couldn’t get off the trail fast enough. However, on our return I did take one of my favorite photos from the middle of the bridge as you start/end the hike… So all was not lost!

Disillusioned with the crowds, we made our way back to an early dinner and called it a day.
Additional Options
I purposely left our third day more open because I wasn’t sure how we’d feel after hiking Angel’s Landing and The Narrows back to back. We needed a bit of down time to see how we felt.
Here are a few ideas to experience even more of the park:
- From the Visitor Center you can hike The Watchman Trail, a moderate 3.1-mile hike. Beware the elevation gain!
- I’ve heard the views from Observation Point, a moderate 7-mile hike, are the best in the park. Be sure to check the road and trail conditions ahead of time.
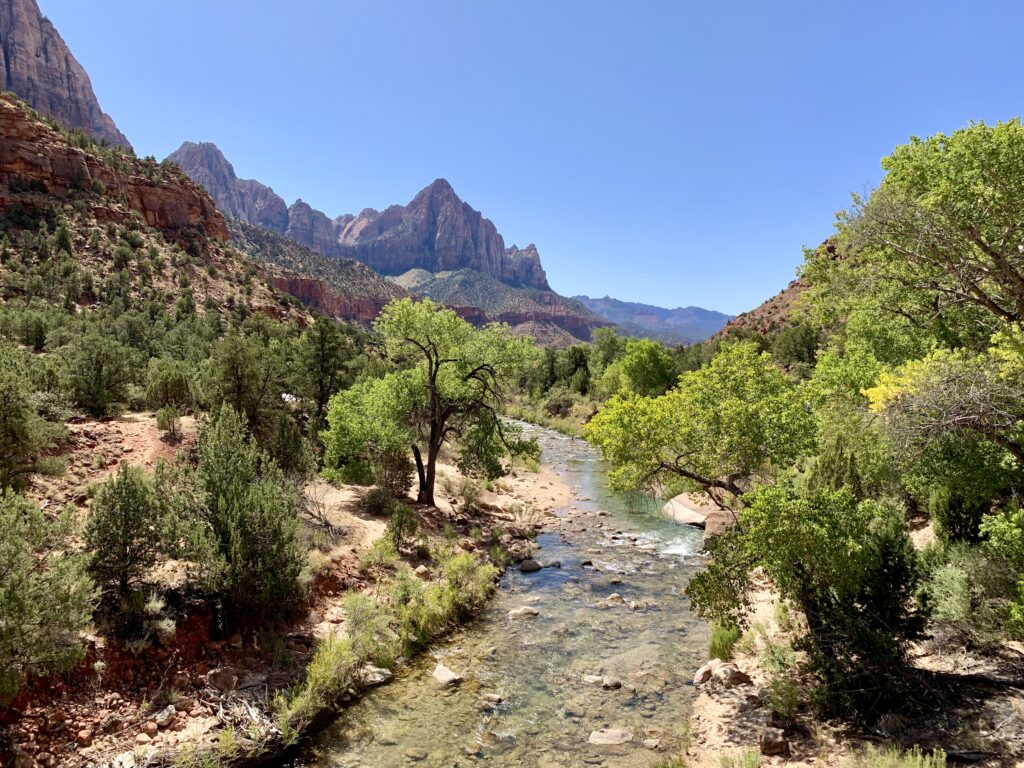
- One of the few accessible, mostly-flat, paved paths in Zion National Park is the Pa’rus Trail. This path is wheel-chair, pet (leashed), and bicycle friendly. It wanders along the beautiful Virgin River. You can take this trail from the Visitor Center to Canyon Junction Bridge, about 1.7 miles one way. Look for the mule deer along the river!
- Lastly, for a less crowded area of Zion to explore, check out Kolob Canyons. Located 45-minutes from Springdale, there is a scenic drive and more hiking trails. We stopped here the next morning before we drove to Bryce Canyon.

Okay, so now you have an idea of how to experience Zion National Park in three days. Let’s talk about planning your trip!
Plan Your Trip To Zion National Park
Map of the Park & Getting Around
To kick off planning your trip, first I recommend getting the lay of the land by reviewing the national park map. It’s easier to decide where to stay and how to plan your days when you understand where things are located in the park. This allows you to maximize your time as well, which is important because there is always so much to do and see.
As you’ll see from the map, the town of Springdale is located on the edge of the southern park boundary, just south of the Visitor Center and Zion Canyon. Most popular hikes and activities are located in Zion Canyon. Meanwhile, Kolob Canyons, another popular area of the park, is located in the northwest section.
How you get around in the park depends on when you visit. During our September visit, cars were not permitted on Zion Canyon Scenic Drive (besides those staying at the lodge), which begins across from the Canyon Junction Bridge. We had to park at the Visitor Center and take the shuttle to reach the various shuttle stops and trailheads.
At the time of our visit, there was also a shuttle than ran in Springdale to the Visitor Center. We did not utilize this shuttle because it didn’t run early enough for us. Plus, we knew early morning parking at the Visitor Center wouldn’t be an issue.
You will want to understand the shuttle schedules and factor in extra time to catch them for your trip. Once you experience Zion Canyon Scenic Drive, you will understand why cars are not permitted–there is no extra parking available!

Park Fees & Reservations
Similar to other popular national parks, Zion NP does require an entrance fee. The amount of the fee depends on how you enter the park (drive in, motorcycle, bike, etc.), and will generally allow you park entrance for 7-days. Click here for fee information.
If you plan to visit multiple national parks over a year’s period, I recommend you check out the America the Beautiful pass. We bought one last May and used it for several national parks and most recently Cape Canaveral National Seashore.
You may be wondering if Zion requires timed-entry reservations, which became common in 2020 to help control the number of visitors in some popular national parks. As of this post in March 2023, Zion does not require a timed-entry reservation to enter the park. However, park requirements constantly change so be sure to check the Zion National Park NPS site for the most updated information, in addition to any closures or restrictions within the park.
While timed-entry reservations are not required (as of April 2023), is Angel’s Landing hike on your to-do list when you visit Zion NP? If so, make advance arrangements to enter the lottery to secure a permit to hike Angel’s Landing. After you get your permit check out our Angel’s Landing survival guide!
Where to Stay Around Zion
As I mentioned, we stayed at the LaQuinta Inn in Springdale. We were very happy with our location, just a 10-minute drive to the park entrance and Visitor Center. If you don’t have a lot of time in Zion, I recommend staying as close to the park as possible to minimize travel time. You can waste a lot of time driving and getting stuck in traffic.
If you plan far enough in advance, check for reservations at the Zion National Park Lodge. You’ll be in the best location to explore the popular trails we’ve mentioned as early as you want, and you’ll have easy access to the shuttles.

When to Visit Zion National Park
If you’ve read our blog long enough, you know we’re big fans of shoulder season travel. Costs are usually a bit lower, the weather is more moderate, and most importantly to us, the park isn’t as busy. If the should season works for you, and avoiding crowds is important I recommend planning your visit on weekdays, and get up early to explore!
For reference, Zion’s busiest months in 2022 were May, June, and July.
However, I realize you can’t always wait for the perfect time. So the best time to go is when you can! If that happens to be during the busy season, so be it.
Also, don’t rule out winter time. I’ve seen photos of Zion with a fresh blanket of snow, and it looked simply magical. However, do check for park closures as well as weather and trail conditions before your visit. Which, really applies to anytime you visit a national park!
Okay! Now you know what to do in Zion National Park for three days, as well as planning considerations. Go have an adventure!
Related Blog Posts: